Why do some resin cars look like painted plastic-while others look like scaled-down show cars under glass?
A true mirror finish isn’t luck, and it doesn’t come from piling on clear coat. It comes from disciplined surface prep, controlled painting, patient curing, and precise polishing.
Resin is less forgiving than styrene: it can hide mold release, show sanding scratches, and react badly to rushed primer or hot solvents. That means every step matters before the shine ever appears.
This guide walks you through the exact process-from cleaning and priming to wet sanding, compounding, and final polishing-so your resin car body reflects light with depth, clarity, and scale realism.
What Creates a Mirror Finish on Resin Model Cars: Surface Prep, Paint Curing, and Gloss Depth
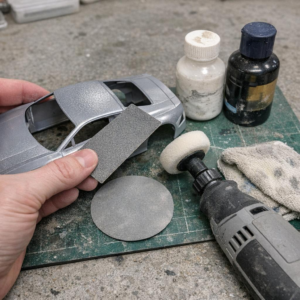
A mirror finish on resin model cars starts long before polishing compound touches the body. Resin often has mold-release residue, tiny pinholes, and uneven primer absorption, so washing the shell, sanding with fine grits, and using a quality automotive primer are what give the paint something smooth to reflect from.
For best results, treat the surface like a miniature auto body panel. I usually sand primer with 2000-3000 grit, check reflections under a desk lamp, then fix any dull patches before color coat; if the primer looks wavy, the clear coat will only make those waves shinier.
- Micro-Mesh sanding pads help level primer and clear coat without cutting too aggressively.
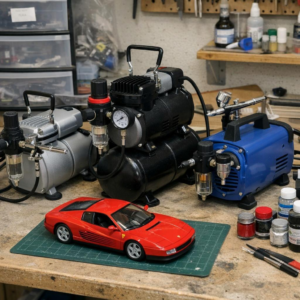
- An airbrush setup, such as an Iwata airbrush with a stable compressor, gives better paint control than cheap aerosol cans.
- A clean spray booth reduces dust, which saves time and lowers the cost of rework.
Paint curing is just as important as paint application. Lacquer, enamel, and 2K automotive clear coat all dry differently, and polishing too early can cause fingerprints, haze, or soft clear that smears instead of shining.
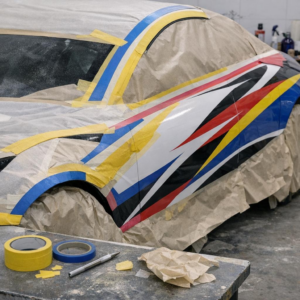
Gloss depth comes from thin, even color coats followed by properly leveled clear coat, not from flooding the surface. For example, on a 1/24 resin Porsche body, two mist coats and two wet coats of clear usually produce a deeper, more realistic shine than one heavy coat that risks runs around panel lines and vents.
The real test is reflection clarity. If you can read the edge of a window frame or LED light strip in the roof panel, your surface prep, curing time, and gloss build are working together.
How to Wet Sand, Polish, and Buff Resin Cars for a Deep Reflective Shine
After the clear coat has fully cured, start wet sanding with clean water and a drop of car shampoo to reduce friction. For resin model cars, I usually begin with 3000-grit if the surface has orange peel, then move through 5000, 7000, and 10000-grit polishing pads; going too aggressive can cut through sharp edges fast.
Keep the surface wet and sand in straight, overlapping passes rather than circles. A real-world trick: on raised fenders and door lines, wrap the abrasive around a soft foam pad instead of using your fingertip, because finger pressure creates uneven low spots that show under gloss paint.
- Use light pressure and let the grit do the work.
- Wipe the panel often with a microfiber cloth to check progress.
- Stop sanding once the surface looks uniformly satin, not dull and scratched.
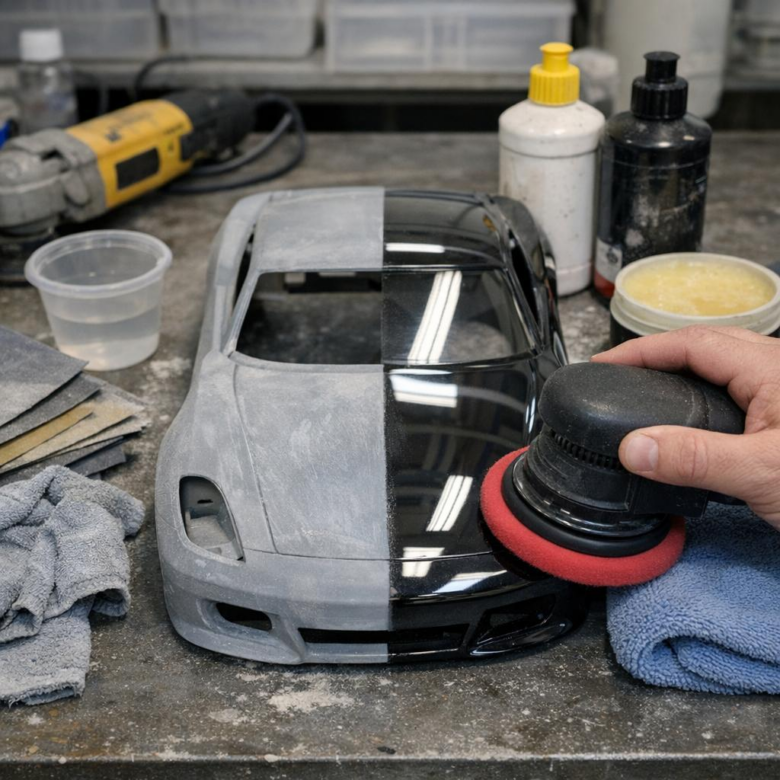
For polishing, apply a small amount of automotive polishing compound such as Meguiar’s Ultimate Compound or Tamiya Finish Compound with a microfiber applicator. Work in small sections until the haze clears, then follow with a finer finishing polish to increase depth and reflection.
Buffing is where the mirror finish appears. Use a clean microfiber cloth or a low-speed mini rotary tool with a foam polishing wheel, but avoid heat buildup because resin can soften or distort. I’ve seen otherwise perfect paint jobs ruined by staying too long on one corner.
Finish with a quality model-safe wax or ceramic-style detail spray for extra slickness and dust resistance. This final step does not replace proper sanding and polishing, but it improves gloss, protects the clear coat, and makes the resin car easier to maintain during display or photography.
Common Mirror Finish Mistakes to Avoid: Orange Peel, Burn-Through, Swirl Marks, and Cloudy Clear Coat
Orange peel usually comes from spraying clear coat too dry, too far away, or in cold conditions. On resin model cars, I’ve seen this happen when a builder uses a hobby spray booth but rushes the final wet coat; the surface looks glossy at first, then dries with a bumpy texture. Use proper air pressure, keep a consistent spray distance, and let each coat flash before applying the next.
Burn-through is one of the most expensive mistakes because it can force a full repaint. It happens when wet sanding cuts through the clear coat into the color layer, especially on sharp edges, roof gutters, and raised body lines. Use light pressure with 3000-5000 grit polishing pads and protect edges with masking tape before using a tool like a Dremel or mini polishing machine.
- Swirl marks: Usually caused by dirty microfiber towels, aggressive compound, or polishing at high speed. Finish with a fine automotive polish and clean foam pad.
- Cloudy clear coat: Often comes from trapped moisture, uncured paint, or polishing before the clear has hardened. Give 2K clear coat proper curing time before sanding.
- Uneven gloss: Common when sanding grits are skipped. Move gradually from 2000 to 3000, 5000, then compound and polish.
A simple test helps: inspect the body under an LED detailing light before final polishing. If you still see sanding haze, don’t add wax yet-keep refining the surface with a finer polish. Quality model car finishing supplies cost less than repainting the entire resin body.
Summary of Recommendations
A mirror finish on resin cars is less about speed and more about control. The best results come from knowing when to stop, inspect, and refine rather than forcing shine through heavier polishing.
- Choose patience if you want depth, clarity, and a show-quality surface.
- Choose restraint around edges, panel lines, and raised details to avoid burn-through.
- Choose quality materials because clean abrasives and compounds make the final gloss predictable.
In the end, the finish should look effortless-but the decision to work methodically is what makes it possible.