Why do “clear” resin prints so often come out cloudy, brittle, or overcured?
Clear and translucent resins behave differently because light doesn’t stop at the layer you’re trying to cure-it scatters, penetrates, and continues hardening details you meant to preserve.
That means standard exposure settings can turn transparent parts into frosted blocks, blur fine features, or fuse delicate channels shut. Proper calibration is the difference between a print that merely survives and one that actually looks optically clean.
In this guide, you’ll learn how to dial in exposure times specifically for clear and translucent resins, so your prints achieve better clarity, sharper detail, and more predictable results.
Why Clear and Translucent Resins Need Different Exposure Calibration Than Opaque Resins
Clear and translucent resins behave differently because UV light travels deeper and spreads farther through the material. With opaque resin, pigments block and absorb more light, so the cured layer is more predictable. With clear resin, extra light can “bleed” into nearby areas, causing swollen details, tight holes, soft text, and supports that fuse more aggressively than expected.
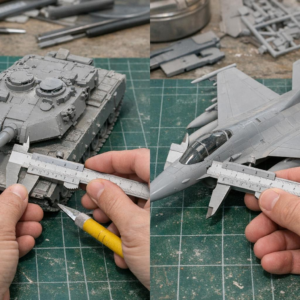
This is why using the same resin 3D printing exposure settings for opaque gray and transparent resin often leads to poor dimensional accuracy. For example, a small engineering bracket printed in clear resin may look clean at first, but screw holes can come out undersized because the walls receive additional UV exposure from light scatter. On an MSLA or LCD 3D printer, that small difference can matter a lot for functional parts, dental models, jewelry prototypes, and transparent display components.
In practice, clear resin often needs more careful exposure calibration, not simply “more exposure.” A good workflow is to test normal exposure time, lift speed, and bottom exposure separately using calibration models in UVtools or exposure tests prepared in Lychee Slicer. Watch for these signs:
- Overexposure: rounded edges, closed gaps, cloudy surfaces, oversized supports.
- Underexposure: weak supports, layer separation, flexible thin walls.
- Light bleed: details curing where they should remain open or sharp.
A real-world tip: calibrate clear resin using the actual part orientation and layer height you plan to print. Transparent resin can pass a basic exposure test but still fail on tall, hollow, or optical parts where internal reflections change how the UV light cures the model.
How to Run Exposure Test Prints for Accurate Layer Curing and Detail Retention
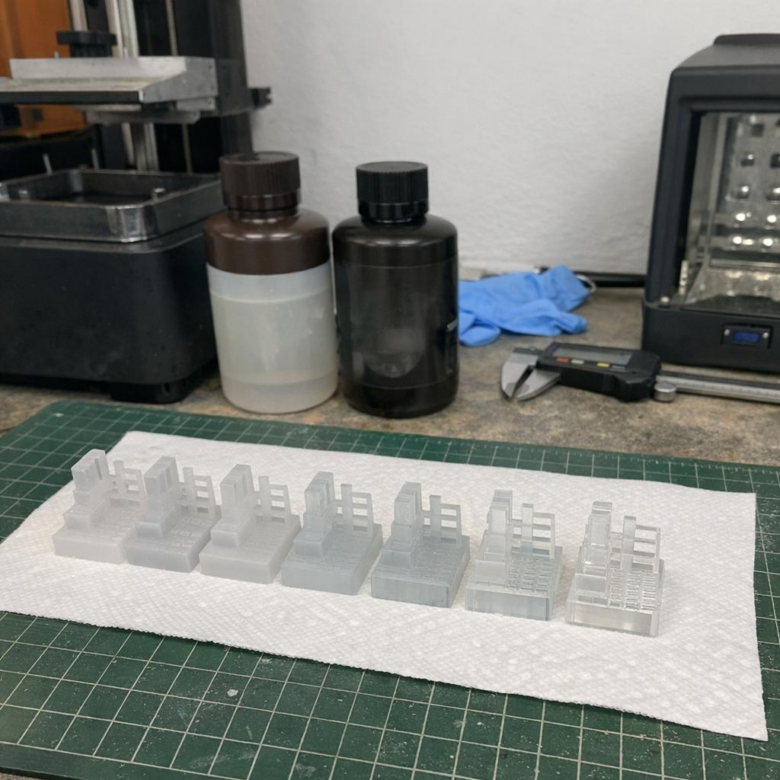
For clear and translucent resins, exposure testing should focus on both strength and optical detail, not just whether the print sticks to the build plate. Start with a validated exposure model such as the Cones of Calibration, AmeraLabs Town, or an exposure matrix in Lychee Slicer, then print it using your normal layer height, lift speed, resin temperature, and anti-aliasing settings.
Run the test in small exposure steps, usually 0.2-0.4 seconds apart for monochrome LCD resin printers. For example, if a transparent resin looks close at 2.4 seconds, test 2.2, 2.4, 2.6, and 2.8 seconds instead of jumping straight to a full production print; that small resin cost can save a failed dental model, miniature part, or prototype enclosure.
- Underexposed: thin pins fail, embossed text looks soft, and supports may peel during printing.
- Overexposed: holes close up, edges swell, and clear resin may look foggier after curing.
- Correct exposure: fine gaps stay open, raised details are crisp, and supports break cleanly without tearing the surface.
A real-world tip: judge the print before heavy post-curing. Clear resin often continues to harden and cloud slightly under a UV curing station, so inspect details after washing and a short dry period first. If you use UVtools, you can also check the sliced file for islands, suction-heavy layers, and exposure compensation issues before wasting premium photopolymer resin.
Once you find the best exposure, save it as a dedicated resin profile with the bottle brand, color, printer model, room temperature, and layer height. This makes future resin calibration faster and keeps dimensional accuracy more consistent across replacement parts, display pieces, and functional prototypes.
Common Exposure Calibration Mistakes That Cause Cloudiness, Overcuring, and Weak Prints
One of the biggest mistakes with clear and translucent resin is treating it like standard gray resin. Transparent materials let UV light travel deeper and scatter inside the print, so an exposure time that looks “safe” on opaque resin can quickly cause cloudy surfaces, swollen details, and brittle parts.
A common real-world example is printing a clear dental splint, jewelry prototype, or fluid chamber with the manufacturer’s default resin profile and then wondering why it looks frosted after curing. In practice, the issue is often not the resin price or printer quality-it is excessive normal exposure, too much bottom exposure, or an aggressive post-cure cycle.
- Overexposing normal layers: causes light bleed, softens fine edges, and makes clear resin look milky instead of glass-like.
- Using too many bottom layers: creates thick, overcured bases that can warp thin translucent parts or crack during removal.
- Skipping controlled test prints: leads to guessing instead of using calibration tools like UVtools, exposure finder files, or slicer resin profiles.
Another overlooked issue is calibrating only for detail, not optical clarity. A print can pass a basic exposure test and still look cloudy because the resin is slightly overcured through the walls. For clear resin, check both dimensional accuracy and transparency by printing a small flat window or hollow test piece before committing to an expensive model.
Also avoid curing wet or poorly washed prints. Residual resin trapped on the surface can haze under a UV curing station, especially on miniatures, medical models, and engineering prototypes where clean visibility matters. Shorter wash cycles, fresh IPA, and staged post-curing usually give better results than simply increasing exposure time.
Key Takeaways & Next Steps
Clear and translucent resins reward patience more than guesswork. Because light travels deeper and scatters differently than in opaque materials, the “right” exposure is the one that balances detail, strength, and dimensional accuracy for your specific printer, resin, layer height, and part geometry.
- Choose shorter exposure when fine detail, tight fit, or optical clarity matters most.
- Choose slightly longer exposure when durability, adhesion, or successful tall prints are the priority.
- Recalibrate whenever you change resin brand, color, layer height, temperature, or screen condition.