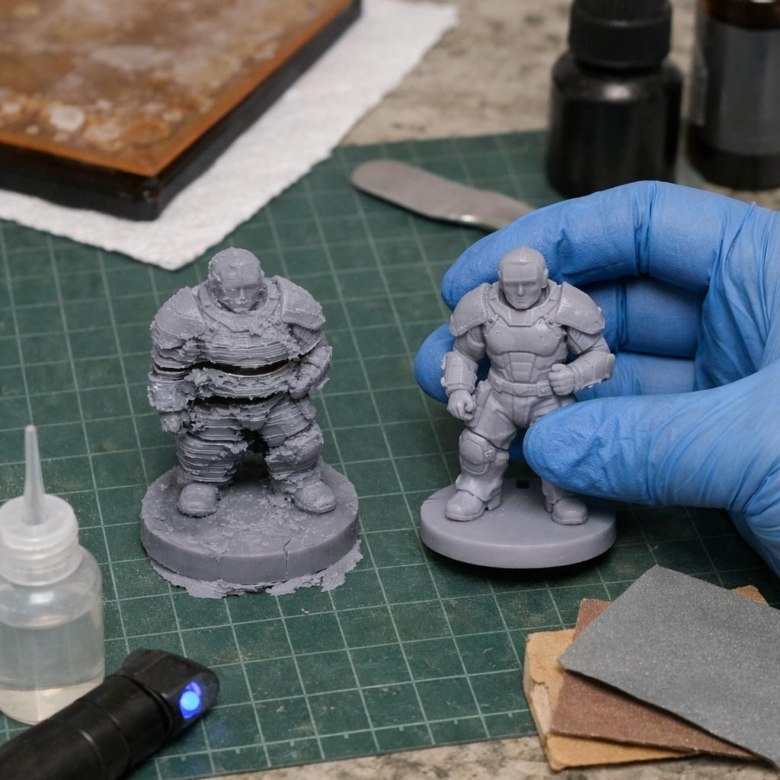
Your resin print didn’t “just fail” – it left evidence. Split layers, shifted sections, and sudden offsets usually point to specific problems in adhesion, suction forces, exposure, or machine stability.
Delamination happens when cured layers stop bonding properly; layer shifting occurs when the print, build plate, vat, or Z-axis movement loses alignment during printing. Both can ruin a model, but they’re rarely random.
In this guide, you’ll learn how to identify the root cause, adjust exposure and lift settings, reduce peel stress, check hardware issues, and prevent the same failure from repeating on your next resin print.
What Causes Resin Print Delamination and Layer Shifting?
Resin print delamination happens when cured layers do not bond strongly enough, while layer shifting usually means the print moved, flexed, or separated during the lift cycle. In real-world resin 3D printing, the cause is often not one setting but a combination of weak exposure, poor supports, suction force, and mechanical movement.
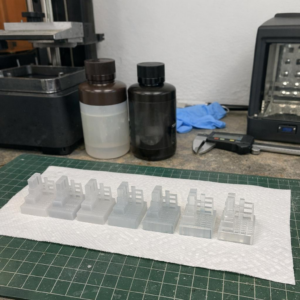
The most common culprit is incorrect exposure time. If normal layer exposure is too low, each layer cures softly and can peel apart like thin plastic film; if it is too high, details swell and supports may become brittle. A slicer such as Lychee Slicer or Chitubox can help you adjust exposure, lift speed, support density, and anti-aliasing based on your resin type and LCD/MSLA printer model.
- Poor build plate adhesion: An unlevel plate, dirty surface, or weak bottom exposure can cause early separation.
- High suction force: Large flat areas pull hard against the FEP film, especially on hollow models without drain holes.
- Weak supports: Thin or badly placed supports let the model wobble, creating shifted or torn layers.
I often see layer shifting on tall miniatures or dental models when users use fast lift speeds to save print time. The print may look fine for the first hour, then a cape, jaw section, or base suddenly offsets because the supports cannot resist peel force. Checking the FEP film for clouding, tightening the Z-axis hardware, filtering resin, and using a proper resin exposure test can prevent costly failed prints and wasted photopolymer resin.
How to Fix Delamination and Layer Shifts Through Exposure, Lift Speed, and Support Adjustments
Start by checking exposure before blaming the resin printer hardware. Underexposed layers stay soft and separate under peel force, while overexposure can make supports brittle and cause sudden layer shifts. In Lychee Slicer or Chitubox, increase normal exposure in small steps, usually 0.2-0.5 seconds at a time, then run a calibration model before printing the full part again.
Lift speed is the next major setting to tune, especially on large flat prints or dense miniatures. If the build plate pulls up too quickly, the suction force can partially detach the model from its supports, creating visible resin print delamination or shifted layers. A practical fix is to lower lift speed and raise lift distance slightly so the FEP film has more time to release cleanly.
- Reduce lift speed: try 40-60 mm/min for difficult prints or flexible resin.
- Increase lift distance: use more clearance for large cross-sections and tight vats.
- Strengthen supports: add medium supports near stress points, not just the lowest islands.
For example, a tall character base may print fine at the bottom, then shift halfway up because the widest section creates heavy suction. I usually add extra supports around that transition zone and slow the lift speed instead of simply adding more exposure. This saves resin, reduces failed print cost, and avoids over-curing fine surface details.
Also inspect the FEP film, resin temperature, and build plate leveling. Even perfect slicer settings will fail if the vat film is cloudy, the resin is too cold, or the plate has poor adhesion.
Common Resin Printing Mistakes That Trigger Layer Separation and Misalignment
Most resin print delamination problems start before the first layer is even cured. The most common mistake I see is using “almost right” exposure settings, especially after switching to a new 3D printer resin, color, or brand. A dark grey engineering resin may need noticeably different exposure than a standard beige resin, even on the same LCD resin printer.
Another frequent issue is poor build plate leveling or weak first-layer adhesion. If the plate is slightly tilted, one side grips while the other side peels too hard from the FEP film, causing layer separation or a visible shift halfway through the model. For example, a dental model or miniature base may print fine on one corner but split on the opposite side because the peel force is uneven.
- Wrong lift speed: Fast lifting can yank large cross-sections off the supports, especially with flexible or high-detail resin.
- Weak supports: Thin tips may look clean in Lychee Slicer, but they can flex during peeling and let the part drift.
- Worn FEP film: Cloudy, loose, or scratched film increases suction and makes layer shifting more likely.
Temperature is also easy to overlook. In a cold garage or workshop, resin becomes thicker, flows slower, and may not refill the print area before the next exposure. Using a resin heater, enclosure, or temperature-controlled printing setup can make a bigger difference than changing random slicer settings.
Finally, avoid overloading the build plate with several large models at once. It may save resin printer time, but it increases peel resistance and support failure risk. Fewer well-supported parts often cost less than reprinting a failed batch.
Key Takeaways & Next Steps
Delamination and layer shifting are rarely random failures; they are signals that the print, resin, settings, or machine is out of balance. The best fix is to change one variable at a time, then verify the result with a small test print before returning to a full model.
- Start with leveling, exposure, lift speed, and support strength.
- If failures repeat in the same direction, inspect the Z-axis, FEP, and build plate.
- If failures vary, focus on resin condition, temperature, and model orientation.
A disciplined troubleshooting approach saves resin, protects detail, and turns failed prints into useful diagnostics.