Your audio interface is not the only thing deciding your latency-your BIOS may be sabotaging every take.
For serious audio production rigs, “low latency” is not a DAW setting; it is a full-system discipline that starts before the operating system even loads.
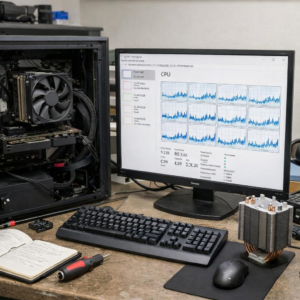
CPU power states, turbo behavior, USB controllers, PCIe settings, onboard devices, and memory profiles can all influence DPC latency, buffer stability, crackles, dropouts, and real-time monitoring performance.
This guide focuses on the BIOS-level changes that help build a tighter, more predictable workstation-one tuned for stable, near-zero-latency recording and mixing rather than generic desktop efficiency.
What BIOS Settings Impact Audio Latency, DPC Spikes, and DAW Stability?
The BIOS settings that usually matter most for low-latency audio are power management, CPU boosting, PCIe behavior, USB control, and onboard device configuration. In real studio builds, I often see DPC latency spikes caused less by the DAW itself and more by aggressive motherboard features trying to save power or dynamically adjust performance during playback.
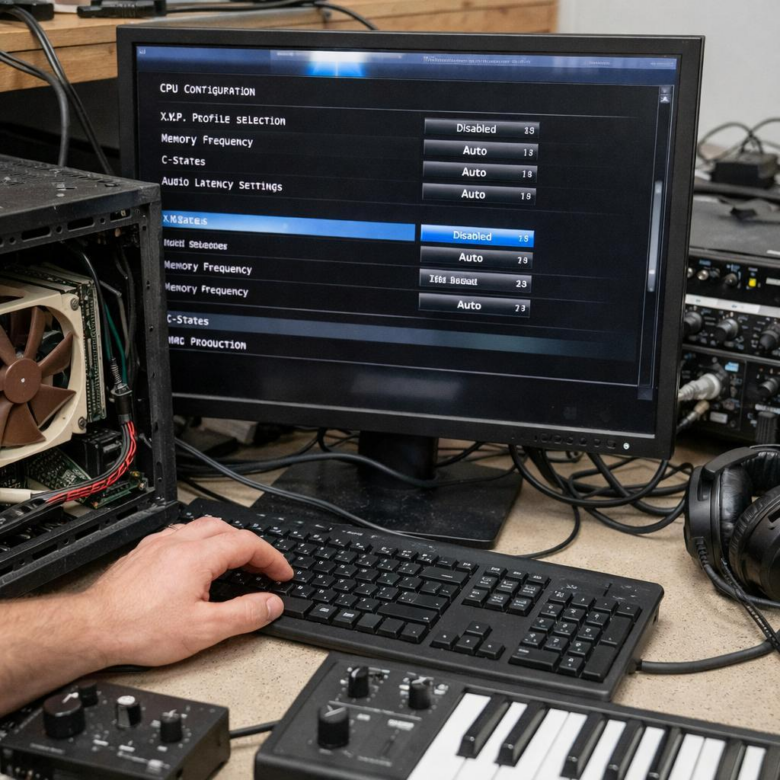
Start with CPU power settings. Disabling deep C-States, package C-State limits, and overly aggressive “eco” modes can help keep the processor responsive when running Ableton Live, Cubase, Pro Tools, or FL Studio at a 64-sample buffer. However, leave Intel Turbo Boost or AMD Precision Boost enabled if your cooling is solid, because modern audio production workloads benefit from strong single-core performance.
- C-States: reduce power use but may cause wake-up delays and audio crackles.
- PCIe ASPM: can introduce latency with audio interfaces, Thunderbolt cards, and GPU drivers.
- USB power saving: may destabilize USB audio interfaces from Focusrite, RME, Universal Audio, or MOTU.
A practical example: a producer using an RME Babyface Pro FS may see clean performance at 128 samples, but random pops at 64 samples. Checking the system with LatencyMon often reveals spikes from USB, network, or graphics drivers, and BIOS changes like disabling PCIe ASPM, onboard Wi-Fi, Bluetooth, or unused SATA controllers can reduce driver interrupts.
For DAW stability, avoid extreme overclocking profiles unless stress-tested with audio workloads, not just gaming benchmarks. XMP/EXPO memory profiles are usually fine, but unstable RAM tuning can cause plugin crashes, buffer underruns, and failed exports-expensive problems when paid sessions or commercial music production deadlines are involved.
How to Configure CPU Power, C-States, USB, PCIe, and Thunderbolt for Real-Time Audio
For a real-time audio production PC, start by disabling aggressive CPU power-saving features that can interrupt low-latency performance. In BIOS, set CPU Power Management to “Performance,” disable deep C-States such as C6/C7/C10, and avoid Eco or Silent modes if you are tracking vocals, guitars, or virtual instruments at small buffer sizes.
Leave Intel SpeedStep or AMD Cool’n’Quiet enabled only if your system remains stable under load; some modern CPUs handle frequency scaling well. In practice, I often see fewer audio dropouts when deep sleep states are disabled, especially on rigs using a Thunderbolt audio interface, UAD hardware, or high-end PCIe DSP cards.
- USB: Disable USB selective suspend in Windows, and in BIOS keep legacy USB support only if needed. Use a dedicated rear motherboard port for your audio interface, not a hub.
- PCIe: Set PCIe power management or ASPM to Disabled. This helps prevent latency spikes on audio interfaces, NVMe drives, and capture cards.
- Thunderbolt: Enable Thunderbolt support, set security to “No Security” or “User Authorization” as required, and enable pre-boot support only when necessary.
After changing BIOS settings, test with LatencyMon while running your DAW, plugins, and audio interface at the buffer size you actually use. For example, a studio computer running Cubase with a Focusrite, RME, or Universal Audio interface may look stable at 512 samples but reveal DPC latency problems at 64 samples. That is the test that matters.
Common BIOS Optimization Mistakes That Cause Pops, Clicks, Dropouts, and Driver Instability
One of the biggest mistakes is disabling every power-saving feature without testing. For low-latency audio production, settings like CPU C-States, SpeedStep, Precision Boost, and Global C-State Control can affect DPC latency, but turning them all off may increase heat, fan noise, and thermal throttling on compact studio PCs or laptops.
A better approach is to change one BIOS setting at a time, then test with LatencyMon while running your DAW, audio interface driver, virtual instruments, and a real session. I’ve seen systems become less stable after “optimization” because the user copied gaming BIOS settings instead of tuning for ASIO performance and sustained audio workloads.
- Overclocking the CPU or RAM: XMP/EXPO profiles can improve performance, but unstable memory timings often cause random clicks, USB audio dropouts, or blue screens during long recording sessions.
- Ignoring USB controller behavior: Some audio interfaces perform better on a specific USB port or chipset. Disabling unused controllers can help, but disabling the wrong one can break MIDI controllers, iLok, or interface detection.
- Forcing PCIe settings: Changing PCIe Gen mode or ASPM without testing may destabilize Thunderbolt audio interfaces, UAD hardware, or DSP cards.
A real-world example: a producer using an RME interface fixed persistent pops not by changing buffer size, but by disabling aggressive CPU idle states and moving the interface to a motherboard USB port tied to the chipset, not the front-panel hub. Small BIOS changes can solve expensive-sounding problems, but only when verified with proper audio latency testing.
The Bottom Line on Optimizing BIOS Settings for Zero-Latency Audio Production Rigs
BIOS tuning for audio production is less about chasing extreme tweaks and more about removing avoidable sources of timing instability. The right choices depend on the rig: a tracking workstation needs predictability above all, while a hybrid production machine may require a more balanced profile.
Practical takeaway: change one setting at a time, test with real sessions, and keep a rollback profile. If a tweak does not improve DPC latency, buffer stability, or dropout resistance, it is not worth keeping. The best BIOS setup is the one that lets your interface, drivers, and DAW perform consistently under pressure.