What if your security cameras could recognize real threats-without turning your home into a privacy risk?
AI-powered surveillance can detect people, packages, vehicles, and unusual activity, but integrating it with Apple HomeKit requires more than simply buying a smart camera.
HomeKit-and especially HomeKit Secure Video-adds encryption, automation, and Apple ecosystem control, yet compatibility, local processing, hubs, bridges, and camera limits can make setup confusing.
This guide breaks down how to connect AI surveillance systems with Apple HomeKit safely, choose the right devices, avoid common integration traps, and build a smarter home security setup that respects your privacy.
What HomeKit Can-and Cannot-Do with AI-Powered Surveillance Cameras
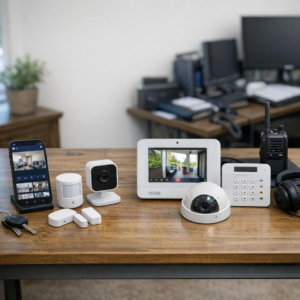
Apple HomeKit is excellent for privacy-focused smart home security, but it is not a full AI video analytics platform. With HomeKit Secure Video, compatible cameras can record encrypted clips to iCloud, detect people, animals, vehicles, and packages, and trigger automations such as turning on outdoor lights when motion is detected.
Where HomeKit works best is in daily home surveillance scenarios. For example, a homeowner using a Logitech Circle View camera can receive a notification when a person is detected at the front door, then have HomeKit turn on the porch light and start recording automatically. That is practical, reliable, and easy to manage from the Apple Home app.
- HomeKit can: manage compatible security cameras, send smart alerts, store encrypted video in iCloud, and run basic automations with lights, locks, sensors, and alarms.
- HomeKit cannot: perform advanced facial recognition analytics, license plate recognition, crowd detection, or enterprise-grade video monitoring on its own.
- You may need extra tools: platforms like Scrypted or Homebridge can help bridge unsupported IP cameras into HomeKit, depending on the camera model and setup.
The key limitation is compatibility. Many AI-powered surveillance cameras from brands focused on commercial security systems offer powerful features, but they may not support HomeKit natively. Before buying, check whether the camera supports HomeKit Secure Video, RTSP, ONVIF, or integration through a trusted bridge, because this affects setup cost, video storage options, and long-term reliability.
How to Connect AI Surveillance Cameras to Apple HomeKit Using Native Support, Homebridge, or Scrypted
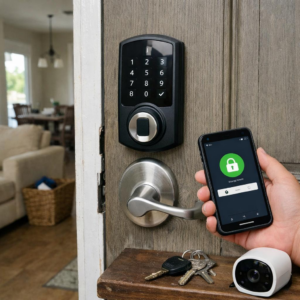
The easiest route is to choose AI security cameras with native Apple HomeKit or HomeKit Secure Video support, such as Eve, Logitech Circle View, or Aqara models. Add the camera through the Apple Home app, scan the HomeKit code, and enable recording rules in iCloud+ if you want encrypted cloud video storage, person detection, package alerts, and activity zones.
If your existing IP camera or NVR does not support HomeKit, use Homebridge or Scrypted as a bridge. In real installations, I’ve seen Scrypted perform better for RTSP cameras because it is optimized for low-latency video streaming and HomeKit Secure Video integration, especially with UniFi Protect, Reolink, Hikvision, and Amcrest systems.
- Native HomeKit: Best for simple setup, privacy-focused smart home security, and reliable Apple Home notifications.
- Homebridge: Good for broad smart home compatibility and older camera plugins.
- Scrypted: Best for advanced AI surveillance camera systems, RTSP streams, NVR integration, and faster Home app live view.
A practical example: if you have a Reolink PoE camera watching your driveway, you can enable RTSP in the Reolink app, add the stream to Scrypted, then expose it to Apple HomeKit. From there, you can view the camera on iPhone, Apple TV, or HomePod announcements, while using automations like “turn on outdoor lights when a person is detected.”
For best results, use wired Ethernet for PoE cameras, assign static IP addresses, and keep the bridge device running on a reliable mini PC, NAS, or Raspberry Pi. This reduces dropped feeds and makes your HomeKit security camera setup feel much closer to a professional surveillance system.
HomeKit Secure Video Optimization: Automations, Privacy Settings, and Integration Mistakes to Avoid
HomeKit Secure Video works best when you treat it as both a security system and a privacy tool. In the Apple Home app, set cameras to “Stream & Allow Recording” only when needed, such as when everyone leaves home, and switch to “Stream Only” or “Off” for indoor cameras when people are home. This reduces unnecessary cloud video storage, limits false alerts, and keeps your smart home security setup more private.
For better AI video surveillance performance, tune motion zones carefully instead of relying on default detection. A front-door camera should monitor the porch and package area, not the sidewalk or passing cars. In real installations, this one adjustment often makes notifications far more useful, especially with video doorbells from brands like Logitech Circle View or Eve Outdoor Cam.
- Use people, animal, vehicle, and package detection to reduce alert fatigue and improve response time.
- Create automations such as turning on exterior lights when motion is detected after sunset.
- Avoid mixing too many bridges unless necessary, as Homebridge or third-party hubs can add latency and troubleshooting costs.
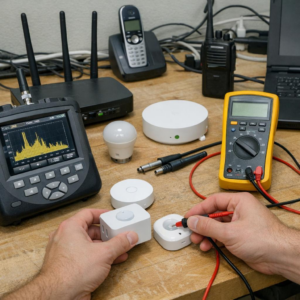
A common mistake is placing cameras where Wi-Fi is weak, then blaming HomeKit Secure Video for missed recordings. Before installation, check signal strength with your router app or a mesh Wi-Fi system such as Eero. Reliable network coverage matters as much as camera resolution, especially if you are comparing smart home installation services, security camera costs, and long-term home monitoring benefits.
Wrapping Up: How to Integrate AI-Powered Surveillance Systems with Apple HomeKit Insights
Integrating AI-powered surveillance with Apple HomeKit is most valuable when it improves security without adding daily friction. The best setup is not always the most advanced one-it is the one that fits your privacy expectations, device ecosystem, and response habits.
Practical takeaway: choose HomeKit-compatible cameras or use reliable bridges only when necessary, keep processing as local as possible, and test alerts before relying on automation.
- Choose HomeKit Secure Video if privacy is your top priority.
- Use third-party AI platforms only when you need advanced detection features.
- Avoid over-automation; security decisions should remain intentional.