What if your lighting looked custom-built-but cost far less than a full renovation?
Recessed low-voltage lighting can sharpen a room’s architecture, eliminate bulky fixtures, and deliver focused illumination exactly where you need it.
But clean results depend on careful planning: transformer placement, fixture spacing, wire sizing, cutout accuracy, and code-safe connections all matter.
This step-by-step guide walks you through the installation process with a practical, professional approach-so your finished lighting looks intentional, efficient, and built to last.
Low-Voltage Recessed Lighting Basics: Components, Benefits, and Planning Requirements
Low-voltage recessed lighting uses a transformer or LED driver to reduce standard household voltage to a safer, lower output, commonly used with LED downlights, accent lights, and cabinet-style fixtures. The main components include the recessed housing, trim, low-voltage LED module, compatible dimmer switch, wiring, and a properly rated power supply. In real homes, I often see problems when someone buys attractive fixtures first and checks driver compatibility later.
The biggest benefits are energy efficiency, cleaner ceiling lines, better beam control, and lower heat output compared with older halogen recessed cans. For example, in a kitchen remodel, low-voltage LED recessed lights can provide bright task lighting over countertops while smaller adjustable trims highlight a backsplash or island seating area. They also work well in basements, bathrooms, hallways, and media rooms where controlled lighting matters.
- Load calculation: Add the wattage of every fixture and choose an LED driver with enough capacity, leaving some headroom.
- Fixture rating: Use IC-rated housings near insulation and damp-rated trims in bathrooms or covered outdoor areas.
- Layout planning: Mark joists, ductwork, and ceiling obstacles before cutting using a stud finder such as Franklin Sensors ProSensor.
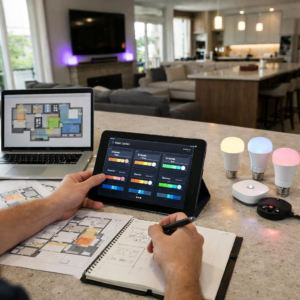
Planning also affects installation cost and long-term reliability. A room with attic access is usually simpler than a finished ceiling with no access, where fishing wires and patching drywall may require extra tools or a licensed electrical contractor. Before buying lighting kits, confirm dimmer compatibility, local electrical code requirements, and whether your project needs a permit.
How to Install Recessed Low-Voltage Lighting: Wiring, Transformer Placement, and Fixture Setup
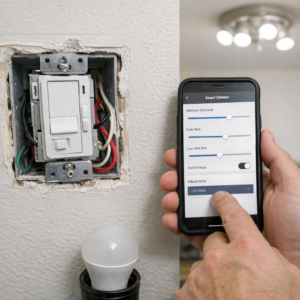
Start by turning off power at the breaker and confirming the circuit is dead with a Klein Tools multimeter. Low-voltage recessed lighting usually runs on 12V or 24V, but the transformer or LED driver still connects to household line voltage, so follow local electrical code or hire a licensed electrician for that part. This is especially important in kitchens, bathrooms, and finished ceilings where junction box access and moisture ratings matter.
Place the transformer or LED driver in an accessible, ventilated location, not buried under insulation unless it is specifically rated for that use. For example, in a recent under-cabinet and ceiling accent lighting setup, placing the driver above a removable closet panel made future dimmer upgrades and troubleshooting much easier. Keep the driver close enough to the fixtures to reduce voltage drop, especially with longer cable runs.
- Use the wire gauge recommended by the fixture manufacturer, often 14/2 or 16/2 low-voltage cable depending on distance and wattage.
- Connect fixtures in parallel when required, so one failed light does not shut down the entire lighting system.
- Match the LED driver to the total fixture load, dimmer type, and whether you need constant voltage or constant current output.
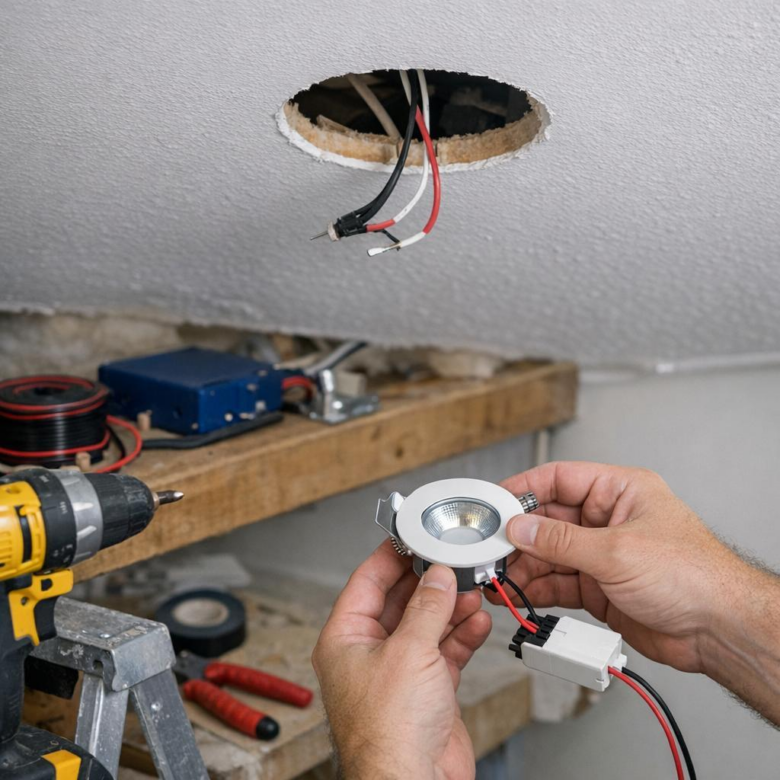
Cut fixture openings with the correct hole saw size, then pull the low-voltage cable to each recessed housing before snapping the trim into place. Test every light before closing the ceiling because a loose push connector or reversed polarity is much easier to fix now than after drywall repair. If you are adding a smart dimmer, confirm compatibility with the LED driver to avoid flicker, buzzing, or premature fixture failure.
Common Installation Mistakes and Optimization Tips for Safer, More Efficient Low-Voltage Lighting
One of the biggest mistakes with recessed low-voltage lighting is undersizing the transformer or LED driver. If the total wattage of your fixtures is too close to the driver’s maximum rating, lights may flicker, run hot, or fail early, so leave a reasonable capacity buffer and choose a quality dimmable driver when using smart dimmers or lighting controls.
Voltage drop is another common issue, especially in long ceiling runs or large open-plan rooms. For example, I’ve seen a kitchen installation where the last two recessed LED lights looked noticeably dimmer because the installer used thin cable over a long distance instead of upgrading the wire gauge or splitting the run.
- Use a voltage tester or multimeter such as a Fluke meter to confirm power is off and verify output voltage.
- Match the LED driver, dimmer switch, and fixture type to avoid buzzing, flickering, or poor dimming range.
- Keep insulation clear of non-IC-rated housings to reduce fire risk and improve heat dissipation.
Do not bury junction boxes behind drywall or insulation; they must remain accessible for inspection, maintenance, and future electrical repair services. Also, avoid mixing cheap generic fixtures with premium drivers, because inconsistent load behavior can create troubleshooting costs that exceed the money saved upfront.
For better efficiency, plan fixture spacing before cutting holes and use adjustable recessed trims where task lighting is needed over counters, artwork, or seating areas. If the project involves multiple zones, smart lighting systems, or uncertain wiring conditions, hiring a licensed electrician may add cost, but it usually improves safety, code compliance, and long-term performance.
Summary of Recommendations
Installing recessed low-voltage lighting is most successful when the layout, transformer capacity, fixture rating, and dimming compatibility are decided before any cutting begins. The best result comes from planning the system as a whole, not treating each light as a separate component.
If you are confident with measuring, mounting, and basic wiring, this project can be a clean upgrade with long-term energy savings. If the installation involves new circuits, crowded ceiling spaces, insulation contact, or code uncertainty, hiring a licensed electrician is the smarter choice. Prioritize safety, choose quality components, and test carefully before closing the ceiling.